As an Amazon Associate, we earn from qualifying purchases. Some links on this site are affiliate links at no extra cost to you. Our recommendations are based on thorough research and editorial judgment.

How to Flush and Sanitize an RO System After Installation
I’ll flush and sanitize my RO system by first shutting off the water supply and draining the tank completely. Then I’ll remove the pre-filters and membrane, add sanitizer like diluted bleach to the first stage housing, and circulate it through the system for fifteen to sixty minutes. After draining thoroughly and rinsing multiple times until no chlorine smell remains, I’ll reinstall everything in reverse order and test with chlorine strips. The following steps will walk you through each stage methodically.
Key Takeaways
- Shut off water supply, drain the tank completely, and close all valves before beginning sanitization work.
- Remove pre-filters in order and use diluted bleach or hydrogen peroxide in stage-1 housing for sanitizing.
- Circulate sanitizer through the system, then allow 15–60 minutes contact time before draining completely.
- Rinse the system multiple times until all chlorine odor disappears and test strips confirm zero residue.
- Reinstall filters in reverse order, verify steady water flow, and test final water quality with chlorine strips.
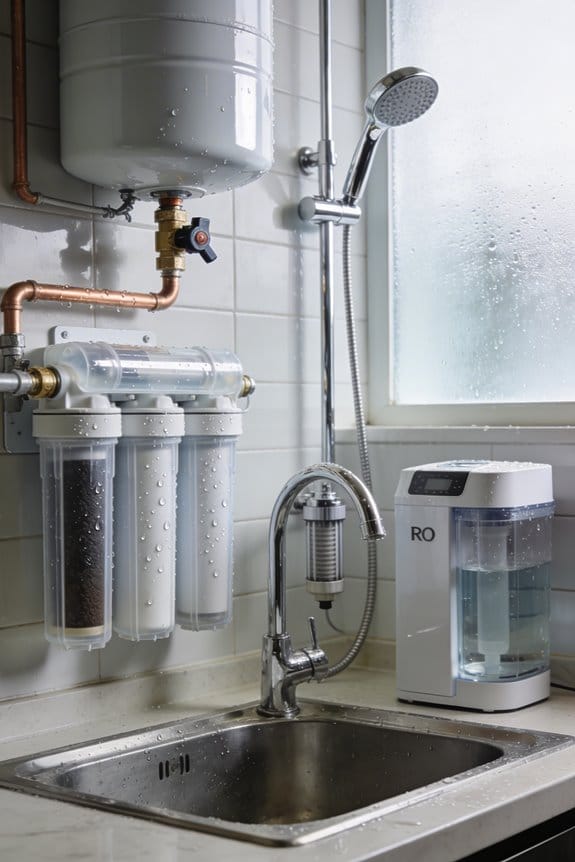
Prepare Your RO System for Sanitization
Before you can sanitize your RO system, you’ll need to shut down the water flow and depressurize all the components inside. Start by turning off the cold water supply connected to your RO system, then drain the storage tank completely through the dispensing faucet. Open the RO faucet to release any remaining pressure trapped in the system.
Next, perform a system inspection by checking all valves, including feed and tank connection points. Consider valve labeling with tape or markers to identify each component’s function, which helps during reinstallation. Shut off every valve to prevent accidental water release. Finally, gather your sanitizing materials—bleach, hydrogen peroxide, or a commercial sanitizing kit—before proceeding with the cleaning process.
Remove Filters and the RO Membrane Safely

Start by carefully extracting the pre-filters from their housings, beginning with stages 1, 2, and 3 in order. For tool selection, I recommend using pliers to remove the RO membrane, which prevents accidental damage during extraction. When handling these components, contamination prevention is essential, so I keep everything in a clean, dry area or store removed filters in water.
I leave the stage-5 post-filter in place initially since it’ll be replaced later. While removing filters, I gently wash the pre-filter housings with mild soap, being careful to preserve the O-rings inside. These rubber seals maintain watertight connections, so protecting them guarantees proper system function after reassembly. Storing components properly prevents dust and debris from compromising water quality during the sanitization process.
Pick Your Sanitizer for Your RO System

Selecting the right sanitizer is essential for effectively disinfecting your RO system, and you’ll find that unscented bleach, hydrogen peroxide, and commercial sanitizing kits all work well for this purpose. Each option offers distinct advantages depending on your needs and sanitizer compatibility with your system components.
Unscented bleach is the most economical choice, though you’ll need to dilute it carefully to avoid damaging delicate membranes. Hydrogen peroxide breaks down into water and oxygen, leaving no residual chemicals. Commercial sanitizing kits are specifically formulated for RO systems, ensuring compatibility with all parts.
Consider your long-term maintenance strategy when choosing. Bleach requires thorough rinsing afterward, while hydrogen peroxide typically needs less extensive flushing. Whatever sanitizer you select, follow manufacturer recommendations to maintain system integrity and water quality effectively.
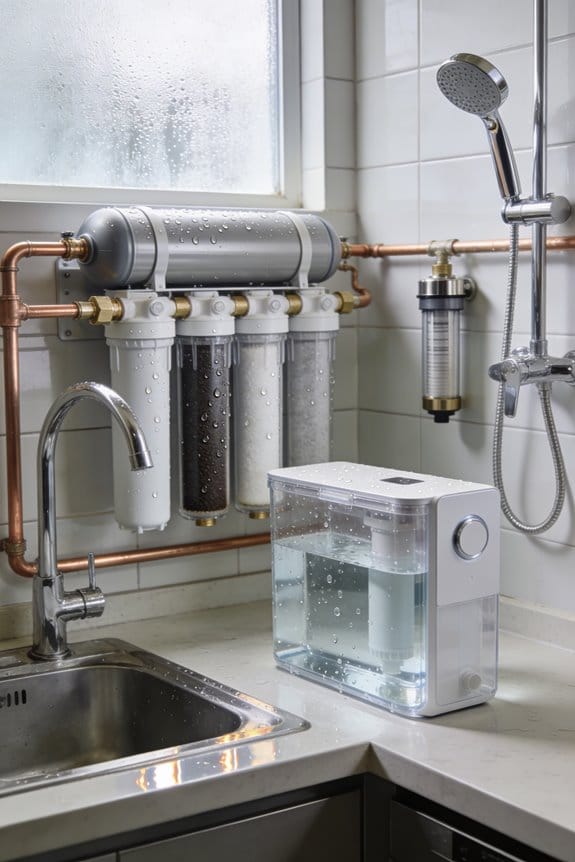
Apply Sanitizer to Each Stage Correctly

Proper sanitizer application requires carefully placing the disinfectant into each stage of your RO system, ensuring that every component receives adequate exposure to kill bacteria and contaminants. I recommend adding ½ cup of unscented bleach to the stage-1 housing as your primary sanitizer placement point. For the first housing, use 2-4 ounces of bleach or hydrogen peroxide, depending on your system size. When using the vent hole technique, inject 1 ounce of bleach directly into the sanitization prefilter cartridge center through this opening. Always dilute bleach with water; never use straight bleach, as it can damage system components. After applying sanitizer to each designated stage, screw the housings back onto the RO head securely, trapping the sanitizing solution inside for maximum effectiveness.
Circulate Sanitizer and Wait for Contact Time

Now that you’ve applied the sanitizer to each stage, you need to turn on your feed water supply so the bleach solution flows through the entire RO system and fills the storage tank, which allows the disinfectant to reach every component that bacteria might inhabit. The flow dynamics of this circulation process guarantee that sanitizer contacts all surfaces inside the system. Keep the water running until you detect a bleach odor at your faucet, then shut everything off. This contact timing is vital for effective disinfection. Allow the system to sit for 15 to 60 minutes, letting the sanitizing solution work thoroughly. During this waiting period, gently rock or shake your storage tank to guarantee complete coverage of all internal surfaces where bacteria colonies might develop.
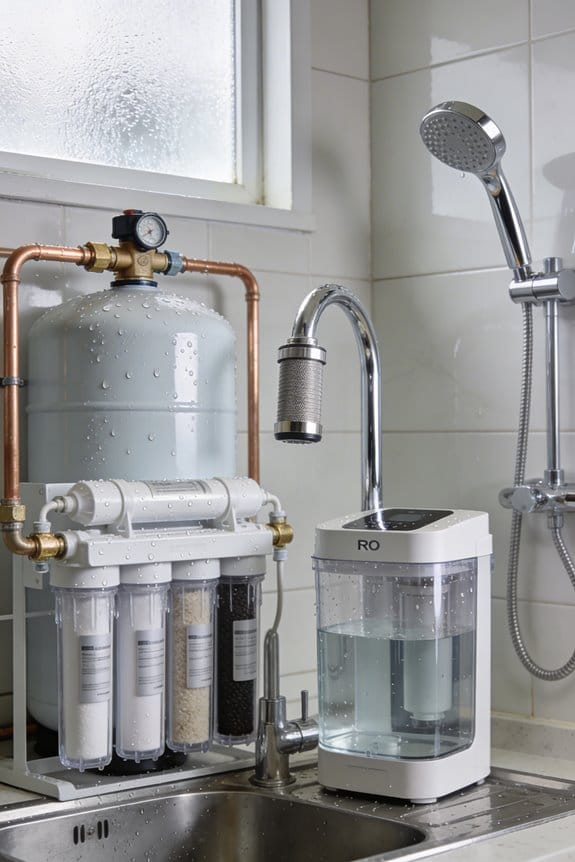
Drain and Flush Out All Chlorine Residue
After the sanitizing solution has sat long enough to disinfect all surfaces, you’ll need to remove the chlorine residue completely before using your RO system again. Open your RO faucet and drain all chlorinated water from the system and tank. Continue flushing for at least five minutes, or until you no longer detect a chlorine smell. The chlorine taste indicates residual sanitizer that could affect your water quality and potentially cause plumbing corrosion over time. Refill your tank with fresh water and drain it completely, repeating this process two to three times. Run a final rinse cycle until your water tastes and smells neutral. If available, use chlorine test strips to verify complete removal before proceeding with filter reinstallation.
Rinse Repeatedly Until Water Runs Clean
Repeating your rinse cycle multiple times guarantees that all traces of chlorine and sanitizer are completely removed from your RO system before you use it for drinking water. I recommend refilling your tank with fresh water and draining it at least two or three times consecutively. Each cycle flushes away remaining chemical residue that could affect your water’s taste and quality. You’ll know you’re finished when the water runs clear without any chlorine smell, which indicates successful sanitizer removal. For aesthetic considerations, check that your water appears colorless and transparent. If you have access to test strips, use them to verify zero chlorine levels. This thorough rinsing process confirms your system is ready for safe, clean drinking water production.
Reinstall Filters and the RO Membrane in Order
Once you’ve confirmed that all chlorine odor and residue have vanished from your system, you’re ready to reassemble your RO unit with fresh or cleaned filters and the membrane. Filter sequencing matters greatly because each stage targets specific contaminants in a particular order. Start by installing the stage-5 post-filter first, then reinsert the RO membrane, paying careful attention to membrane orientation—the curved end typically faces downward into the housing. Next, reinstall your pre-filters in numerical order: stages 3, 2, and 1. Make sure all O-rings are properly seated and housings are screwed on firmly. Finally, run water through your system until you achieve steady flow without spurting, then discard the initial product water until quality stabilizes completely.
Confirm Your RO System Is Fully Sanitized
You’ll want to verify that your sanitization process actually worked before you consider the job complete, since residual bleach or bacteria could compromise your water quality. I recommend using chlorine test strips, which measure remaining bleach levels in your water. For thorough sanitization verification, dip a strip into water from your faucet and compare the color to the provided chart. The reading should show zero chlorine residue. If you detect chlorine, continue flushing until it disappears completely. For advanced microbial testing, I suggest sending a water sample to a laboratory, which can identify any remaining bacteria or contaminants. This professional analysis provides definitive confirmation that your RO system is safe and fully sanitized before regular use.
Frequently Asked Questions
How Often Should I Sanitize My RO System After the Initial Installation?
I’d recommend you sanitize your RO system annually, though seasonal flushing every three to six months keeps it running like a well-oiled machine. Your water’s purity depends on this vigilance—don’t let neglect steal your system’s strength.
Can I Use Scented Bleach or Must I Use Unscented Bleach Only?
You must use unscented bleach only. I’d avoid scented versions because fragrance interactions can contaminate your water quality and potentially damage system components during sanitization.
What Should I Do if Chlorine Smell Persists After the Final Rinse?
If chlorine’s lingering like a stubborn ghost, I’d recommend extending your odor troubleshooting by repeating the rinsing cycle. You’ll want to contemplate a venting procedure—opening faucets fully to purge trapped sanitizer pockets thoroughly.
Is It Safe to Drink Water Immediately After Reinstalling All Filters?
I wouldn’t drink it immediately. You’ll want to run water through until it’s steady without spurting, then discard initial product water. I’d recommend taste testing first and doing a plumbing inspection to make certain everything’s secure before consuming.
How Do I Know if My RO Membrane Was Damaged During Removal?
I’d inspect your RO membrane for visible cracks or tears. You’ll notice reduced water pressure or flow rate if it’s damaged. Perform pressure testing post-reinstallation to confirm proper functionality and membrane integrity.